
In the world of high-end crochet, we often see whimsical creatures and soft toys, but rarely do we encounter a piece that exudes the sophisticated charm of a bespoke tailored suit and a heritage aesthetic. Introducing « The Gentleman Architect, » a masterpiece of amigurumi design that bridges the gap between traditional craft and Haute Couture. This design is a testament to the KROCHETA brand aesthetic: precision, elegance, and an unwavering commitment to detail.
This isn’t just a project; it’s a study in structural crochet. From the perfectly rimmed fedora to the scalloped edging of the sage blazer, every stitch serves a purpose. Designed for the advanced maker, this doll features complex facial needle-sculpting to create a kind, lived-in expression, complemented by a meticulously textured mustache and silver-fox hair. Whether you are looking to elevate your personal collection or create a museum-quality gift, this pattern provides the blueprint for excellence.
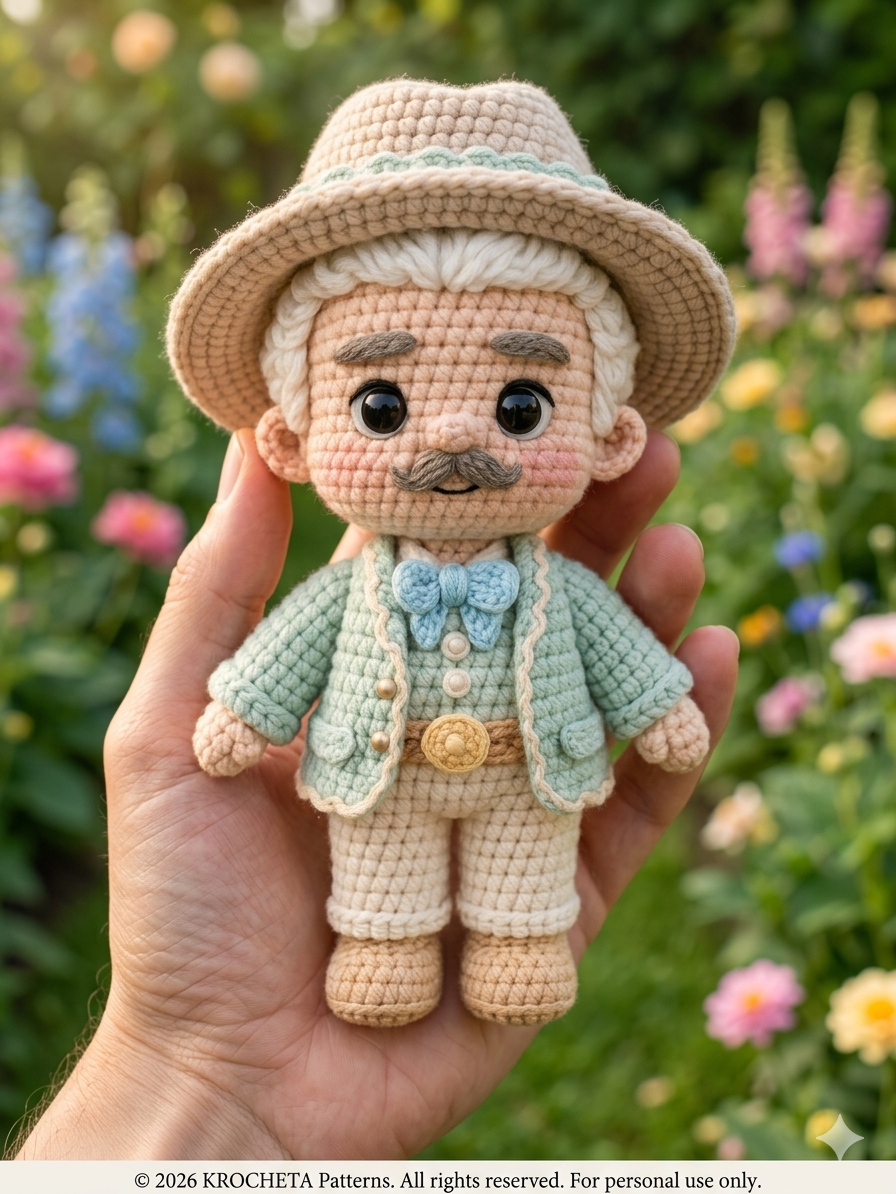
Visual Analysis & Palette
The design utilizes a sophisticated, muted palette that evokes a spring morning in a Parisian atelier:
- Sage Garden: A soft, desaturated green for the blazer.
- Champagne Cream: The primary tone for the trousers and hat.
- Antique Sand: Used for the skin tone and boot details.
- Powder Blue: A delicate accent for the butterfly bow tie.
- Silver Birch: Used for the textured hair and facial features.
Technical Metadata
- Skill Level: Advanced / Haute Couture
- Estimated Time: 15–20 Hours
- Finished Size: Approximately 11 inches (28cm) using recommended hook sizes.
- Key Techniques: Invisible Color Changes, Needle Sculpting, Scalloped Surface Crochet, Wire Armature Integration, and Waist Tapering.
1. Materials & Preparation
- Yarn: Premium Mercerized Cotton (Sport weight / 4-ply).
- Hooks: 1.5mm (for details/hair) and 2.0mm (for body/clothing).
- Eyes: 12mm Black safety eyes with white embroidery thread for the « glint. »
- Notions: 2mm copper wire for frame, fiberfill, tapestry needle, and miniature pearl buttons.
2. The Haute Couture Pattern
Part A: The Head & Face Sculpting
Using Antique Sand yarn.
R1: 6 sc in MR [6]
R2: 2 sc in each st [12]
R3: (1 sc, inc) x 6 [18]
R4: (2 sc, inc) x 6 [24]
R5: (3 sc, inc) x 6 [30]
R6: (4 sc, inc) x 6 [36]
R7: (5 sc, inc) x 6 [42]
R8: (6 sc, inc) x 6 [48]
R9-R18: sc in each st [48]
Note: Place eyes between R14 and R15, 8 sts apart.
R19: (6 sc, dec) x 6 [42]
R20: (5 sc, dec) x 6 [36]
R21: (4 sc, dec) x 6 [30]
R22: (3 sc, dec) x 6 [24]
R23: (2 sc, dec) x 6 [18]
R24: (1 sc, dec) x 6 [12]
Fasten off. Surgical Needle Sculpting: 1. Thread a long needle with skin-tone yarn.
2. Insert at the neck base, exit at the outer corner of the left eye.
3. Re-insert at the inner corner, exit at the neck. Pull tight to create a socket. Repeat for the right eye.
4. The Nose: Using a small amount of stuffing, crochet a tiny 4sc MR and sew between the eyes.
Part B: The Torso (Waist Tapering & Bust)
Starting in Champagne Cream (for trousers), switching to Sage.
R1: 6 sc in MR [6]
R2: inc in each st [12]
R3-R6: sc in each st [12]
R7: (inc, 5 sc) x 2 [14] (Shaping the hips)
R8-R12: sc in each st [14]
R13: (dec, 5 sc) x 2 [12] (Waist Tapering)
R14: Switch to Sage. sc in each st [12]
R15: (1 sc, inc) x 6 [18] (Bust/Chest expansion)
R16-R20: sc in each st [18]
R21: (1 sc, dec) x 6 [12]
Fasten off.
Part C: The Artisan Hair & Mustache
The Wig Cap: Using Silver Birch, follow Head R1-R8.
The Texture: Work in the Front Loops Only. (Ch 3, sl st in next) across the entire cap to create the « brushed back » look.
The Mustache: Ch 8. Starting in 2nd ch from hook: sl st, sc, hdc, dc, hdc, sc, sl st. Fasten off and sew with a slight « curl » upward.
3. The Wardrobe: Blazer & Fedora
The Sage Blazer
- Panels: Work in rows rather than rounds to create the open jacket effect.
- Scalloped Edging: Once the jacket is assembled, join Cream yarn at the hem. * (Sc, skip 1, 3 dc in next, skip 1, sc) * repeat around the perimeter.
The Fedora
Using Champagne Cream.
R1-R6: Follow Head pattern to [36].
R7-R10: sc in each st (Sides of hat).
R11: In Front Loops Only: (2 sc, inc) across.
R12: (3 sc, inc) across to create the wide brim.
R13: Finish with a Crab Stitch (Reverse Single Crochet) for a firm, luxury edge.
4. Pro Assembly Guide
- The Spine: Insert a 2mm wire from the head down to the legs. This allows The Gentleman to stand with a dignified posture.
- Invisible Join: When sewing the head to the body, use the « ladder stitch » to ensure no thread is visible.
- The Details: Add three pearl buttons to the waistcoat area and one larger gold-toned button for the belt buckle.